Introduction
Picture this: the wilted cabbage leaves you'd normally toss, the beet tops destined for the compost bin, the slightly soft carrots lingering in your crisper drawer. Now imagine transforming these kitchen castoffs into tangy, probiotic-rich foods that boost your gut health and save you money. That's the magic of zero waste fermentation—an ancient preservation technique that's become the modern solution to two pressing concerns: reducing food waste and improving personal wellness.
Every year, the average household throws away hundreds of pounds of edible food scraps that could be fermented into nutritious, delicious additions to meals. According to the USDA, food waste accounts for 30-40% of the food supply in the United States alone. Zero waste fermentation offers a practical, accessible way to dramatically reduce your kitchen's environmental footprint while creating foods that support digestive health, enhance nutrient absorption, and add complex flavors to your cooking.
In this comprehensive guide, you'll discover the science behind fermentation, learn which scraps make the best ferments, master essential techniques, and build a sustainable fermentation practice that transforms your relationship with food waste. Whether you're a curious beginner or looking to deepen your fermentation skills, you'll find actionable steps to start your zero waste fermentation journey today.
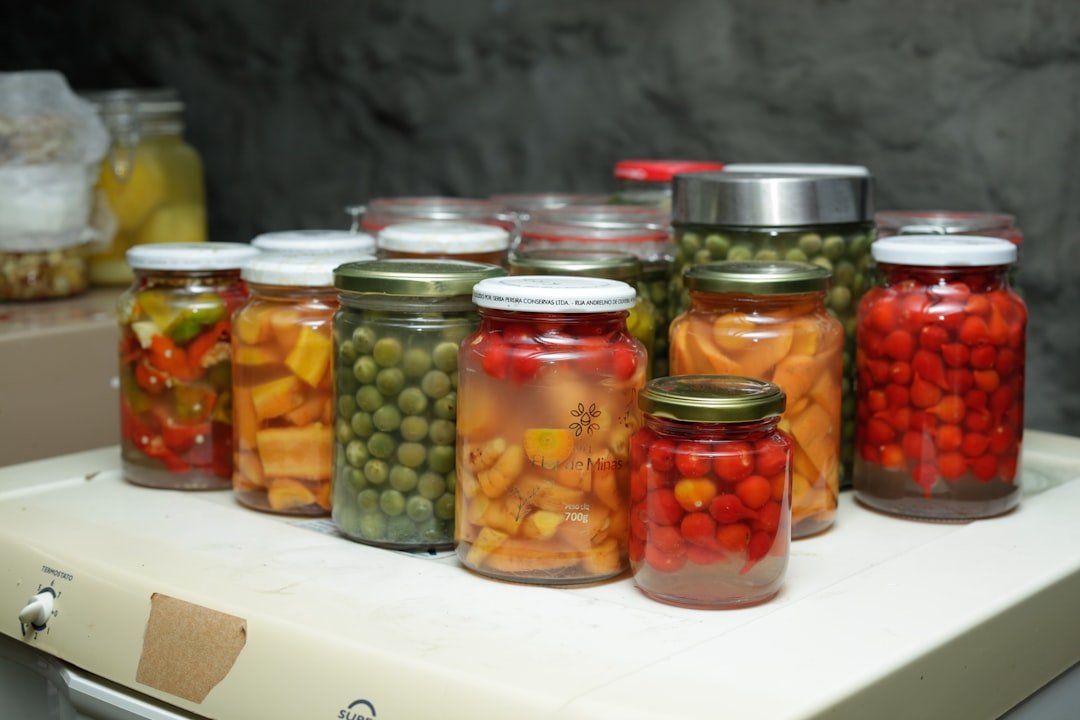
Photo by PROJETO CAFÉ GATO-MOURISCO on Unsplash
What is Zero Waste Fermentation?
Zero waste fermentation combines two powerful concepts: the ancient art of lacto-fermentation and the modern zero waste movement. At its core, fermentation is a metabolic process where beneficial bacteria, primarily Lactobacillus, convert sugars in food into lactic acid. This natural preservation method has been used for thousands of years across every culture—from Korean kimchi to German sauerkraut, from Indian achaar to Japanese tsukemono.
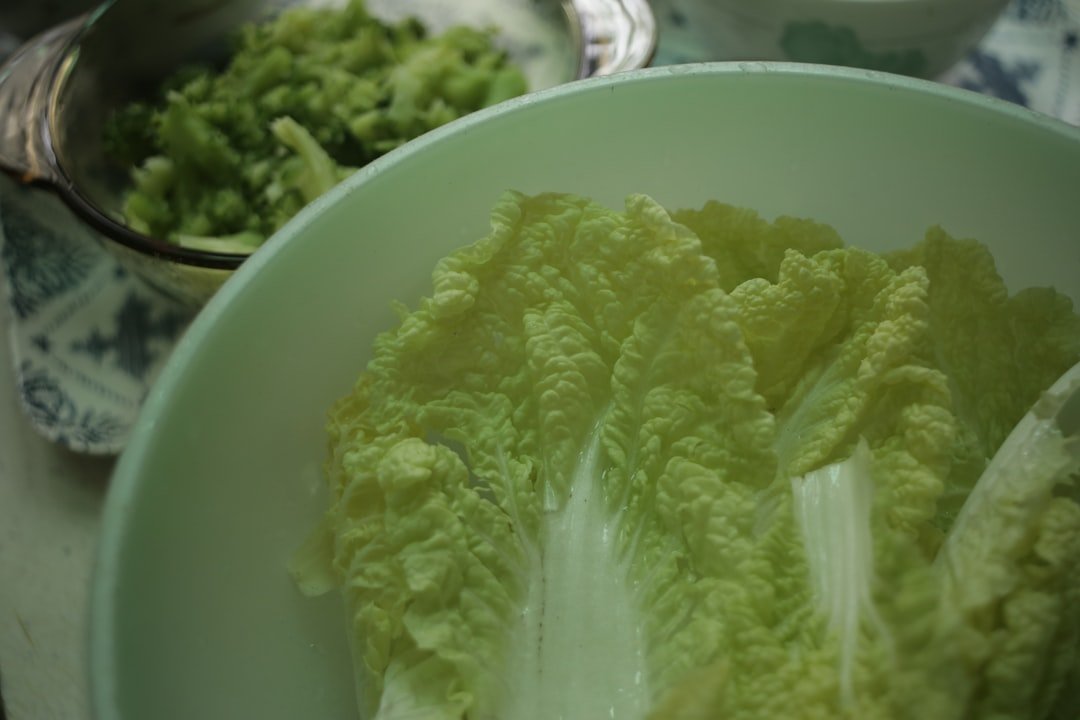
What makes zero waste fermentation unique is its focus on using parts of produce that typically end up in the trash or compost bin. Carrot tops, broccoli stems, watermelon rinds, citrus peels, and vegetable trimmings all become valuable ingredients rather than waste. This approach recognizes that many discarded plant parts are not only edible but often more nutrient-dense than the portions we typically consume.
The Science Behind the Transformation
When you submerge vegetables in a salt brine and create an oxygen-free environment, you set the stage for lacto-fermentation. The salt draws water from the vegetables through osmosis, creating a brine that inhibits harmful bacteria while allowing beneficial Lactobacillus species to thrive. These bacteria are naturally present on the surface of all vegetables and need no special starters or cultures.
As the bacteria consume sugars in the vegetables, they produce lactic acid, which lowers the pH and creates an environment where pathogens cannot survive. This is why properly fermented foods are remarkably safe—the process is essentially self-regulating. The FDA recognizes lacto-fermentation as a safe preservation method when done correctly.
The byproducts of this bacterial activity include not just lactic acid but also vitamins, enzymes, and beneficial compounds that weren't present in the original vegetables. Fermentation essentially pre-digests food, breaking down cell walls and making nutrients more bioavailable to our bodies.
Why Zero Waste Fermentation Matters
The intersection of sustainability and personal health makes zero waste fermentation one of the most impactful kitchen practices you can adopt. The benefits ripple outward from your gut to your wallet to the planet, creating a virtuous cycle of wellness and environmental stewardship.
Environmental Impact
Food waste is a massive environmental problem that often goes overlooked. When food scraps end up in landfills, they decompose anaerobically and produce methane—a greenhouse gas 25 times more potent than carbon dioxide. The EPA estimates that food waste in landfills accounts for approximately 58% of fugitive methane emissions.
By fermenting your vegetable scraps instead of discarding them, you're directly preventing these emissions while also reducing the resources wasted in growing, transporting, and processing food that never gets eaten. Every jar of scrap-based sauerkraut or pickle represents water, soil nutrients, farmer labor, and transportation fuel that wasn't wasted.
Health and Nutritional Benefits
The health benefits of fermented foods have been validated by modern science, with research published in journals like Nature Reviews Gastroenterology & Hepatology confirming their positive effects on the gut microbiome. Fermented vegetables provide:
- Probiotics: Live beneficial bacteria that support digestive health, immune function, and even mental well-being through the gut-brain axis
- Enhanced nutrients: Fermentation increases B vitamins, vitamin K2, and bioavailable minerals
- Improved digestibility: Pre-digested fibers and broken-down anti-nutrients make fermented foods easier to absorb
- Enzymes: Living enzymes aid digestion and reduce the burden on your pancreas
Many vegetable scraps are actually more nutritious than the parts we typically eat. Broccoli stems contain more fiber than florets. Carrot tops are rich in vitamin K and potassium. Beet greens pack more iron than the roots. Fermenting these scraps concentrates and enhances these nutritional benefits.
- Dramatically reduces household food waste and environmental impact
- Creates nutrient-dense, probiotic-rich foods at minimal cost
- Requires no special equipment—just jars, salt, and vegetables
- Extends produce shelf life from days to months
- Develops complex, umami-rich flavors impossible to achieve otherwise
- Supports gut health, immunity, and overall wellness
- Preserves seasonal abundance for year-round enjoyment
- Requires 3-14 days of patience before ferments are ready
- Learning curve to understand proper salt ratios and techniques
- Some ferments develop strong odors during the process
- Need consistent cool storage space for fermenting and finished products
- Not all scraps are suitable for fermentation
Economic Benefits
Store-bought fermented vegetables command premium prices, often $8-15 for a small jar. Many commercial products are also pasteurized, killing the beneficial bacteria that make fermentation so valuable. By fermenting at home with scraps, you're creating superior products for pennies per serving while simultaneously reducing your grocery waste and stretching your food budget further.
Consider this: a head of cabbage costs around $2 and yields roughly three jars of sauerkraut. But if you're making sauerkraut from outer leaves, core pieces, and other trimmings you'd normally discard, your cost drops to essentially zero while still producing delicious, living food.
How to Start Zero Waste Fermentation
Getting started with zero waste fermentation requires minimal investment and equipment. The beauty of this practice lies in its simplicity—humans have been fermenting foods for millennia without fancy gadgets or precise measurements. Here's your complete roadmap to beginning your fermentation journey.
Essential Equipment
You likely already have most of what you need in your kitchen. At minimum, you'll need:
- Glass jars: Wide-mouth mason jars (quart or half-gallon size) work perfectly. Avoid plastic, which can harbor bacteria and leach chemicals.
- Sea salt or kosher salt: Use non-iodized salt without anti-caking agents, which can inhibit fermentation. Fine sea salt or Diamond Crystal kosher salt are ideal choices.
- A weight: Something to keep vegetables submerged under the brine. Options include a smaller jar filled with water, a zip-lock bag filled with brine, glass fermentation weights, or even a clean rock.
- A knife and cutting board: For preparing your scraps.
- A large bowl: For massaging salted vegetables.
Optional but helpful equipment includes fermentation crocks, airlock lids, a kitchen scale for precise salt measurements, and a mandoline for consistent slicing.
-
Collect scraps throughout the week in a container in your refrigerator. Good candidates include cabbage cores and outer leaves, carrot tops and peels, broccoli and cauliflower stems, beet greens and stems, radish greens, celery leaves, onion ends and skins, pepper cores and stems, and cucumber ends.
-
Rinse scraps well to remove dirt but don't scrub aggressively—beneficial bacteria live on vegetable surfaces. Chop, slice, or grate into consistent pieces for even fermentation. Remove any moldy, slimy, or truly inedible portions.
-
Use 2% salt by weight for most vegetable ferments. For every 1000g of vegetables, add 20g of salt. Alternatively, use approximately 1 tablespoon of fine sea salt per pound of vegetables. Toss vegetables with salt in a large bowl.
-
Massage salted vegetables firmly for 5-10 minutes until they release their juices and become limp. Let rest for 30 minutes to an hour, massaging occasionally. The vegetables should produce enough brine to cover themselves.
-
Transfer vegetables and all accumulated brine to clean glass jars. Pack firmly, pressing down to eliminate air pockets. Leave 1-2 inches of headspace. The brine should cover vegetables completely—if not, add a small amount of 2% salt water.
-
Place your weight on top of the vegetables to keep them submerged. Cover the jar with a cloth secured by a rubber band, a loose lid, or an airlock lid. The goal is to allow gases to escape while preventing contaminants from entering.
-
Place jars away from direct sunlight in a spot between 60-75°F (15-24°C). Warmer temperatures speed fermentation; cooler temperatures slow it. Check daily, pressing vegetables down if they rise above the brine.
-
Begin tasting after 3-5 days. When the flavor reaches your desired tanginess, seal with a regular lid and refrigerate. Fermentation slows dramatically in the cold, and your ferments will keep for months.
The Scrap Collection System
The key to successful zero waste fermentation is developing a system for collecting and storing scraps until you have enough to ferment. Here's an effective approach:
Keep a dedicated container in your refrigerator—a large glass jar, food storage container, or produce bag works well. As you cook throughout the week, add appropriate scraps to this container. Cabbage leaves, vegetable trimmings, herb stems, and other fermentable materials all go in together.
Once you've accumulated 1-2 pounds of scraps (usually after 4-7 days of cooking), you're ready to ferment. This rhythm naturally aligns with a weekly fermentation practice that becomes second nature.
Label your scrap container with the date you started collecting. Scraps stored in the refrigerator remain fermentable for 7-10 days. If they develop off odors, visible mold, or excessive sliminess before you ferment them, compost those portions and start fresh.
Best Scraps for Zero Waste Fermentation
Not all kitchen scraps are created equal when it comes to fermentation. Understanding which scraps ferment well—and which to avoid—will set you up for success. The best fermentation candidates are firm, fresh vegetable scraps with good cell structure and natural sugars for the bacteria to consume.
| Scrap Type | Fermentation Quality | Best Uses | Special Notes |
|---|---|---|---|
| Cabbage cores & outer leaves | Excellent | Sauerkraut, kimchi base | The classic; reliable and forgiving |
| Carrot tops & peels | Excellent | Fermented salsa, pesto base | Tops add herbaceous, parsley-like flavor |
| Broccoli & cauliflower stems | Very Good | Mixed vegetable ferments, pickles | Peel tough outer layer; inner stem is tender |
| Beet greens & stems | Very Good | Fermented greens, kvass | Adds beautiful pink color to ferments |
| Radish greens & tops | Very Good | Kimchi, mixed ferments | Peppery kick; mellows during fermentation |
| Celery leaves & hearts | Good | Flavor addition to any ferment | Use sparingly—strong flavor intensifies |
| Watermelon rind | Excellent | Pickled rind, relish | Remove green skin; white rind ferments beautifully |
| Citrus peels | Good | Preserved lemons, flavor additions | Organic only; uses different salt-packing method |
| Herb stems | Good | Flavor infusions | Add to other ferments rather than fermenting alone |
| Apple cores & peels | Excellent | Apple scrap vinegar | Different process; makes vinegar not lacto-ferment |
Scraps to Avoid
Some kitchen scraps don't ferment well or can create problems:
- Moldy or rotting produce: Fermentation preserves fresh vegetables; it can't rescue spoiled ones
- Starchy scraps (potato peels, pasta water): Can create off-flavors and textures
- Very soft or mushy vegetables: Lack the structure for good fermentation
- Allium skins (dry onion/garlic skins): Too papery; the flesh ferments well but skins don't
- Cruciferous scraps in excess: Broccoli, cabbage, and cauliflower scraps are great, but using only these can create very sulfurous ferments
- Anything treated with wax or pesticides: Opt for organic scraps or peel non-organic produce before adding to ferments
Seasonal Fermentation Opportunities
Aligning your fermentation practice with seasonal produce maximizes both flavor and savings. Spring brings radish greens and early brassicas. Summer offers abundant zucchini, cucumber, and pepper scraps along with watermelon rinds. Fall is prime time for cabbage, apples, and root vegetable ferments. Winter focuses on stored roots, citrus, and maintaining your fermented food supply from the abundant seasons.
Essential Zero Waste Fermentation Recipes
These foundational recipes transform common kitchen scraps into fermented staples. Master these techniques, and you'll have the skills to improvise with whatever scraps your kitchen produces.
Scrap Sauerkraut
This forgiving recipe works with almost any combination of cabbage family scraps—outer leaves, cores, and stems from cabbage, Brussels sprouts, broccoli, or cauliflower.
Ingredients: - 2 pounds mixed brassica scraps (cabbage leaves and cores, broccoli stems, cauliflower cores) - 1 tablespoon fine sea salt (about 2% by weight) - Optional: 1 teaspoon caraway seeds, juniper berries, or other spices
Instructions: 1. Slice scraps thinly or grate using a food processor or mandoline 2. Toss with salt in a large bowl and massage vigorously for 10 minutes 3. Rest 30 minutes, then massage again until scraps are limp and swimming in brine 4. Pack tightly into a quart jar, pressing to remove air pockets 5. Weight down and cover; ferment 7-14 days at room temperature 6. Taste regularly after day 5; refrigerate when pleasantly tangy
Stem and Scrap Kimchi
Traditional kimchi uses whole napa cabbage, but this waste-reducing version highlights stems, cores, and odds and ends. The technique remains authentic; only the ingredients change.
Ingredients: - 2 pounds vegetable scraps (cabbage cores, radish greens, carrot tops, broccoli stems) - 2 tablespoons sea salt - 1/4 cup Korean red pepper flakes (gochugaru) - 4 cloves garlic, minced - 1 inch fresh ginger, grated - 2 tablespoons fish sauce (or soy sauce for vegan version) - 1 teaspoon sugar - 4 green onion scraps, chopped
Instructions: 1. Cut scraps into bite-sized pieces and toss with salt; let rest 2 hours 2. Rinse scraps briefly and squeeze out excess water 3. Blend or mash garlic, ginger, pepper flakes, fish sauce, and sugar into a paste 4. Toss scraps with paste and green onions until well coated 5. Pack firmly into jars, pressing to submerge in liquid 6. Ferment 3-7 days, tasting daily until desired flavor develops 7. Refrigerate; flavor continues developing for weeks
Fermented Vegetable Scrap Broth Base
This innovative technique ferments mixed vegetable scraps into a concentrated flavor base for soups, stews, and grains. It's essentially a fermented mirepoix that adds depth and umami to any dish.
Ingredients: - 2 pounds mixed vegetable scraps (onion ends, celery leaves, carrot peels, herb stems, mushroom stems) - 2 tablespoons sea salt - 1 tablespoon whole peppercorns - 2 bay leaves - 4 cups water
Instructions: 1. Roughly chop scraps and pack into a half-gallon jar 2. Dissolve salt in water to create a 3% brine 3. Add peppercorns and bay leaves; pour brine over scraps 4. Weight scraps under brine and cover loosely 5. Ferment 2-3 weeks at room temperature, skimming any surface scum 6. Strain liquid into bottles; use as instant broth or cooking liquid 7. Scraps can be composted after straining
Watermelon Rind Pickles
This Southern classic transforms the part of the watermelon most people throw away into a sweet-tangy pickle that's perfect alongside grilled foods or cheese plates.
Ingredients: - Rind from 1/2 large watermelon (about 2 pounds) - 2 tablespoons sea salt - 2 cups water - 1 cinnamon stick - 1 teaspoon whole cloves - 1 inch fresh ginger, sliced
Instructions: 1. Remove green outer skin and pink flesh; cut white rind into 1-inch cubes 2. Dissolve salt in water for brine 3. Layer rind with spices in a jar; cover with brine 4. Weight and cover; ferment 5-7 days 5. Taste for desired tanginess; refrigerate when ready 6. Flavor develops further over 2-3 weeks in refrigerator
No image uploaded.
Common Mistakes to Avoid
Even experienced cooks encounter challenges when starting to ferment. Understanding common pitfalls helps you troubleshoot problems and achieve consistent results. Most fermentation failures come down to a few preventable mistakes.
Insufficient Salt
Salt is the primary safeguard that allows beneficial bacteria to thrive while inhibiting harmful organisms. Using too little salt is the most common cause of fermentation failures, leading to mushy textures, off-flavors, and potential spoilage.
The fix: Weigh your vegetables and use 2-2.5% salt by weight. If you don't have a scale, use 1 generous tablespoon of fine sea salt per pound of vegetables. When in doubt, slightly more salt is safer than less—you can always add vegetables to dilute an overly salty batch.
Vegetables Above the Brine
Any vegetable matter exposed to air becomes a breeding ground for mold and harmful bacteria. The anaerobic (oxygen-free) environment below the brine is what makes fermentation safe and successful.
The fix: Check your ferments daily during active fermentation. Press vegetables down and ensure your weight keeps everything submerged. If vegetables persistently float, use a better weighting system or add more brine (2% salt water).
Using the Wrong Salt
Iodized table salt contains additives that can inhibit fermentation and create off-flavors. Anti-caking agents can make brines cloudy and slow bacterial activity.
The fix: Use sea salt, kosher salt, or pickling salt. Check ingredient labels—you want just "salt" or "sea salt" with no additional ingredients. Fine-grained salts dissolve faster and distribute more evenly.
Fermenting at Extreme Temperatures
Temperatures above 80°F (27°C) can cause ferments to progress too quickly, develop off-flavors, or spoil. Temperatures below 55°F (13°C) slow fermentation dramatically and may prevent it altogether.
The fix: Find a spot in your home that stays between 60-75°F (15-24°C). Basements, interior closets, or northern-facing rooms often work well. In summer, you may need to ferment for shorter periods; in winter, expect longer fermentation times.
Mistaking Kahm Yeast for Mold
Kahm yeast appears as a thin, white, wrinkly film on the surface of ferments. While unappealing, it's harmless—unlike true mold, which appears fuzzy, colored (often green, black, or pink), and penetrates below the surface.
The fix: Skim off kahm yeast and continue fermenting. The vegetables beneath remain safe and delicious. True mold requires discarding the batch, as it sends invisible threads throughout the ferment. When in doubt, trust your nose—mold smells musty and "off," while healthy ferments smell pleasantly sour.
Waiting Too Long to Refrigerate
Fermentation is a continuous process. Left too long at room temperature, ferments become increasingly sour, eventually developing harsh, almost caustic flavors and very soft textures.
The fix: Begin tasting your ferments after 3-5 days. Refrigerate when the sourness reaches a level you enjoy—the cold dramatically slows fermentation, essentially pausing it at your preferred flavor. Remember that ferments continue developing slowly in the refrigerator, so if anything, err on the side of refrigerating slightly early.
Using Old or Compromised Scraps
Fermentation preserves fresh vegetables; it doesn't resurrect spoiled ones. Scraps that are already moldy, slimy, or have strong off-odors will produce failed ferments.
The fix: Collect scraps regularly and use them within a week. Store scraps in the refrigerator, not at room temperature. Inspect scraps before fermenting and compost any questionable pieces. A ferment is only as good as its ingredients.
Best Practices for Zero Waste Fermentation
Moving beyond the basics, these expert practices will help you develop consistency, expand your repertoire, and integrate zero waste fermentation seamlessly into your kitchen routine.
Develop a Rhythm
The most successful home fermenters establish regular habits. Consider setting a weekly "fermentation day" when you process accumulated scraps, check active ferments, and rotate finished products into refrigerator storage. This consistent attention prevents forgotten jars, ensures you use ferments at their peak, and helps you build intuition for timing and technique.
Keep Detailed Notes
Fermentation involves many variables—ingredient ratios, salt percentages, temperatures, and timing. Keeping a simple fermentation journal helps you replicate successes and learn from failures. Note what scraps you used, salt amounts, fermentation time, ambient temperature, and final flavor assessment. Over time, these notes become an invaluable personal reference.
Layer Flavors Strategically
Successful scrap ferments often combine ingredients with complementary flavors and textures. Pair mild ingredients (cabbage cores, watermelon rind) with more assertive ones (radish greens, garlic scraps). Add aromatics like ginger, garlic, and chili to basic vegetable ferments. Include a few herb stems or spices to add complexity without overwhelming the base vegetables.
Create a Fermentation Station
Designate a specific area for your fermentation practice. This might be a corner of your counter, a shelf in a cool pantry, or a section of basement shelving. Having a dedicated space keeps ferments organized, makes daily monitoring easier, and prevents forgotten jars from being pushed to the back of a cabinet.
Your fermentation station should include: - Active ferments in progress - Clean, ready-to-use jars - Your scrap collection container - Weights, lids, and other equipment - Your fermentation journal
Master One Technique Before Expanding
Begin with simple sauerkraut-style ferments before exploring more complex techniques. Once you can consistently produce good sauerkraut from scraps, branch into kimchi-style ferments, brined pickles, or fermented hot sauces. Each technique builds on skills from the previous one, and rushing ahead often leads to frustration and waste.
Build a Fermented Pantry
As your skills develop, work toward maintaining a rotating selection of fermented foods. Aim for variety in flavors (mild, tangy, spicy), textures (crunchy pickles, soft sauerkraut), and uses (condiments, side dishes, cooking ingredients). A well-stocked fermented pantry might include:
- Classic sauerkraut for everyday use
- Spicy kimchi for Korean-inspired dishes
- Fermented hot sauce for adding heat and depth
- Pickled vegetable scraps for snacking and garnishing
- Fermented vegetable broth base for soups and cooking
- Preserved citrus for Mediterranean and Middle Eastern flavors
Share Your Ferments
Fermentation naturally produces abundance. Even small batches yield more than most households can consume before the next batch is ready. Share ferments with friends, family, and neighbors. This spreads the environmental and health benefits of fermented foods, introduces others to zero waste practices, and frees up space in your refrigerator for new experiments.
Start Your Sustainable Kitchen Journey
Zero waste fermentation is just one piece of creating a more sustainable kitchen. Explore our complete guide to reducing kitchen waste for more practical strategies that work with your lifestyle.
Read the Kitchen Waste GuideFrequently Asked Questions
Conclusion
Zero waste fermentation represents a beautiful convergence of ancient wisdom and modern sustainability needs. By transforming kitchen scraps into probiotic-rich foods, you're simultaneously reducing your environmental footprint, improving your gut health, and connecting with a preservation tradition practiced by humans for thousands of years.
The journey begins with a single jar. That pile of cabbage cores, those carrot tops you'd normally toss, the broccoli stems languishing in your crisper—they're all waiting to become something greater. With just salt, time, and a little attention, you'll transform waste into wellness.
Start small, perhaps with a simple scrap sauerkraut this weekend. Let the process unfold naturally, tasting as you go, learning what works in your kitchen and with your palate. Before long, you'll develop an intuition for fermentation that makes the practice feel less like following recipes and more like a creative collaboration with beneficial bacteria.
Remember that perfection isn't the goal—progress is. Some batches will be better than others. You'll occasionally forget to check a ferment or misjudge the salt. These aren't failures; they're learning opportunities that make you a more skilled fermenter.
The scraps accumulating in your refrigerator right now represent an opportunity. Every carrot peel, every cabbage core, every vegetable trimming is a chance to reduce waste, create nourishing food, and participate in a practice that benefits both personal health and planetary wellness.
Your zero waste fermentation journey starts today. Gather those scraps, grab a jar, and transform what you'd throw away into something that nourishes your body and lightens your impact on the earth. One jar at a time, one ferment at a time, you're making a difference.
Ready to Reduce More Kitchen Waste?
Zero waste fermentation is just the beginning. Discover more practical strategies for creating a sustainable kitchen that fits your real life—no perfection required.
Explore Our Kitchen Guides
Comments
No comments yet. Be the first to comment!
Leave a Comment